Do you have a childhood treasure that just doesn't fit in your home's decor? Something you just can't get rid of but don't want stored in a box forever? If so, this may be the project for you!

When I was sorting through some boxes that had been stored in my parents basement for mumble mumble years, I came across the gorgeous guy you see below. You see, like many women, I had been horse-mad when I was a kid. Of course this meant that I filled my room with galloping horses, just like this one.

Now, since I don't have a horse-mad daughter and am trying not to end up on an episode of Horders, into the donate box he went. There Black Beauty lived for a few weeks until I remembered Remington and his bronze statues of horses and their riders. Ideas on how to accomplish something similar began to bubble and percolate in my brain.
Then I had it, I would turn Black Beauty into my own bronze statue and keep him forever!
Step 1: Gather Materials

- Horse
- Gorilla Glue (not pictured)
- Drill and bit - bit should be the same size as the shank of the screws
- Primer
- Copper Spray Paint
- Hammered bronze spray paint
- 1x4 piece of wood - cut to the size that fits your horse
- 1x6 piece of wood - cut 2 inches larger that the 1x4
- screws - 1" and 1-1/4"
- caulk
- pencil (not pictured)
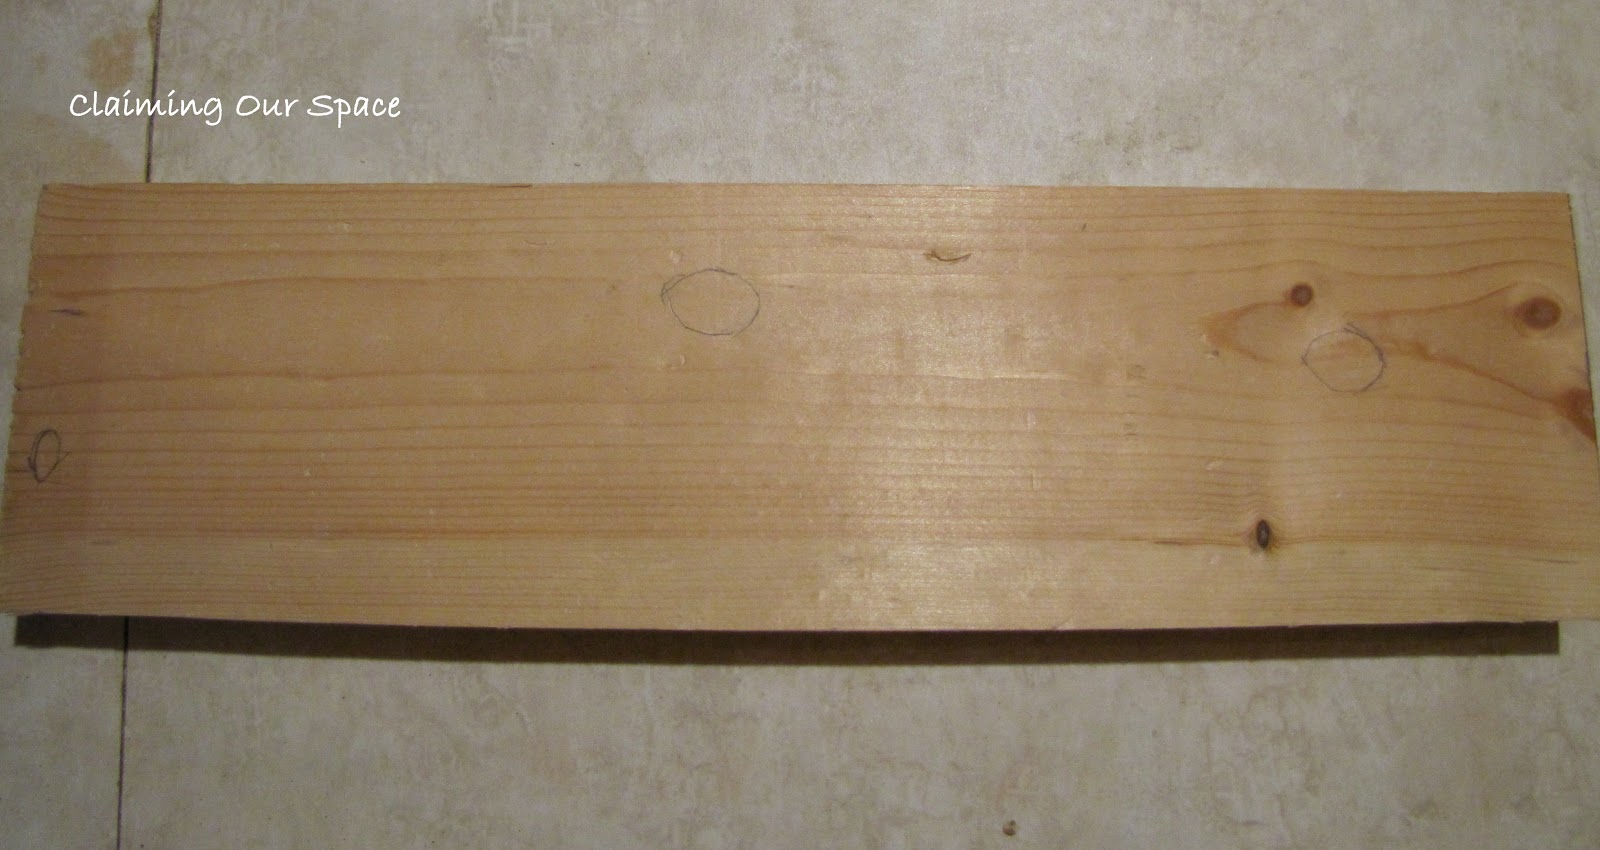
- Draw circles around the hooves on the 1x4

- Draw an arrow to mark the centers and then drill the holes

- Drill holes in the bottom of the hooves

Step 3: Attach your horse to your base (Sorry, I don't have any photos of this. Since I don't have 3 hands I couldn't take any photos.) and caulk the seam
- Place a bit of glue in the center of each circle
- Using the 1" screws, screw into your pilot holes until the screws just poke out of the top of the piece of wood
- With the base on its side, place the horse so the holes in the hooves settle on top of the screws
- Finish screwing the horse to the base
- Set aside overnight to let the glue harden completely

Step 4: Attaching the secondary base
- Set the horse and base onto the 1x6 and, measuring to make sure that it is centered, mark the edges so you can make sure to drill inside the lines

- Clamp the pieces of wood together and then lean everything over onto a couple of rags so you can screws the pieces of together.

- Caulk the seam between the two pieces of wood

Step 5: Painting
- Prime and let dry

- Paint with copper spray paint and let dry. It will take a couple of light coats to get complete coverage.

- Paint with bronze spray paint and let dry. It will take a couple of light coats to get complete coverage.
- Display!

Here's a close up. I think it turned out pretty well. You would never know he was just a molded plastic underneath.

This shot shows how the detail really stands out thanks to using light coats of spray paint.

I think Black Beauty now should be called Bronze Beauty!
To see where I am linking up, check out the Places I Party.
Crafting Rebellion, Type A and Better After were kind enough to feature this project on their blogs.


What a great idea! I was a horse crazy kid too. :) I really love how it looks!
ReplyDeleteThanks for stopping by. Glad you like it.
DeleteGreat work on the horse!! It looks fabulous!
ReplyDeleteThanks for linking to a Round Tuit!
Hope you have a fabulous week!
Jill @ Creating my way to Success
http://www.jembellish.blogspot.com/
Thanks! And thanks again for hosting a great party.
DeleteAwesome idea! It looks great! :)
ReplyDeleteThanks for the nice comment and thanks for stopping by.
DeleteWow! This is amazing! The Breyer horses have such wonderful sculptural shapes; it's nice to see them used for grown-up display. And you're right about the Remington bronzes. I'll have to see if I can snag a horse at a yard sale or something. A fake racing award would be just right for Hubby's Steampunk study project.
ReplyDeleteGlad you like it and I would love to see what your racing award looks like once you make it!
DeleteThis turned out beautiful! What a great way to upcycle and old toy! Stopping by from Singing Three Little Birds. Cheers!
ReplyDeleteThanks so much for stopping by!
DeleteWhat a WONDERFUL IDEA!!!!! I would absolutely LOVE it if you would come share this at my Link Party at the-crafty-cowgirl.com - Now I know what to do with some of those horse figures that I have never been able to part with...just don't know if I want to do it with my beloved Breyers though I have some others that will work perfect!
ReplyDeleteThanks for the nice comment. If you do the same with one of your horses, let me know, I would love to see. And heading over to link now.
DeleteThat is so BRILLANT! Those statues can be so expensive! I love this project!
ReplyDeleteGlad you like it! Thanks for stopping by.
DeleteVisiting from the party at The Girl Creative. My daughter is horse mad and we have a ton of these. I love the grown up look and will have to remember this when she gets older. :) Great job!
ReplyDelete-sara @ applestonedrive.blogspot.com
Thanks for stopping by to check it out. Glad I gave you an idea for helping your daughter remember her horse mad youth. :-)
DeleteGreat idea. Nice way to hold onto the memories. I'd love for you to stop by Etcetorize to share at the Make it Great party going on right now (http://etcetorize.blogspot.ca/2012/03/egg-necklace.html). Hope to see you there~
ReplyDeleteGlad you like my project. Heading over to link up now.
DeleteLove it! I have a box of horses that I am holding onto for my daughter's to play with... when the bashing each other over the head phase is over, LOL! Visiting from Motivate Me Monday at Keeping It Simple.
ReplyDelete~Kimberlee, The Spunky Diva
Thanks for stopping by! And holding onto them so hooves and tails don't end up in eyes or ears is probably a good idea.
DeleteWhat a super idea. The possibilities are endless! I just popped over from Coastal Charm's party. Thanks for the tut!
ReplyDeleteAmy {aprons & ambition}
Thanks for stopping by!
DeleteThis is amazing...what a great way to use old toys! Thanks so much for sharing at Mix it up Monday :)
ReplyDeleteThanks for stopping by and thanks for hosting a great party.
DeleteThis is such a wonderful idea. What a very creative way to transform a cherished item from your childhood into a cherished item in your adulthood. Very impressive. Great job!
ReplyDeleteThanks so much for the nice comment. I am so glad that Beauty is now out of the basement and out on display.
DeleteI love this idea. We all have toys from childhood that we just can't seem to part with. At the same time, they sit in the attic gathering dust. Great way to keep the sentiment alive and to be environmentally friendly by reusing something you already have.
ReplyDeleteThanks so much for stopping by and the nice comment. I am now excited to go through the rest of my boxes to see if anything else needs to be transformed!
DeleteWhat an incredible idea! I've saved some of y kids stuff from when they were little thinking I'd pass it on to my grandchildren in the future. But this is a nice way to bring it into their current lives but in a sophisticated way. Thanks fro a great idea.
ReplyDeleteI would love to see how you transform your kids stuff into something they can display now. Hope you will share it.
DeleteI absolutely love this!! My daughter has tons and tons of Breyer horses and I never thought of changing them like this.
ReplyDeleteThanks so much for stopping by! If one of your daughter's horses gets transformed, I would love to see how it turns out.
DeleteGreat idea! Featured this on my site today!
ReplyDeletewww.craftingrebellion.com
This is a great idea! Thanks for linking up to Terrific Tuesdays.
ReplyDeleteRachel
adventuresofadiymom.blogspot.com
Thanks for hosting a great linky party!
DeleteI just did this to a plastic zebra that I stole from my kids ;) I love how you made a base for yours; makes it look even more like it's meant to be decor and not a toy that's been painted- my kids keep trying to take the one I made off the shelf to play with! :) I love how yours turned out!
ReplyDeleteThanks for stopping by. Bronze Beauty turned out better than I could have hoped. Good luck in keeping your zebra safe. :-)
DeleteThat's a cool idea. Never would have thought of that. But maybe that's because then I know my kids would want to play with the lamp?
ReplyDeleteLaura
Thanks. I have moved Bronze Beauty to a less conspicuous spot so when we have little visitors, he isn't in so much danger.
DeleteOH. MY. GOODNESS.
ReplyDeleteI was horse-crarzy, too!! I had a collection of Breyers that overflowed my shelves to the point that we put huge crown molding 3/4 of the way up my wall to use as shelving. My Breyer collection wrapped around all four walls of my room, and I couldn't resist buying them at garage sales and flea markets. To this day I don't have the heart to get rid of them... I'm hoping that my three-year-old will develop an obsession and we can enjoy them together. ^_^
HOWEVER, that being said, I know I have some beat up horses in my collection that I wouldn't mind transforming into something beautiful. =} Thank you so much for the inspiration!!
~Nicole @ www.shabbybeachnest.com
I had many more that were given away long ago and only Black Beauty and a palomino ended up getting packed away. I am working on a project using the palomino that should show up in the coming weeks. Thanks so much for stopping by
Deletevery cute love the idea
ReplyDeleteOh man I'm in love! Looks super west elm/pottery barn-ish.
ReplyDeleteThanks for stopping by. I am so pleased at how it turned out.
DeleteCame over from Better After. Love your horse. Now I have it on my to do list....but first to find one! Thanks.
ReplyDeleteThanks for stopping by! I would love to see your version if you find a horse of your own.
DeleteWell I'll be darned, this has got to be the most creative thing I've seen in a long time. Who would have thunk it? Very cool. Thanks for sharing your DIY knowledge.
ReplyDeleteThanks! Isn't it amazing what some spray paint can do?
DeleteI love this! Great littl tutorial too!
ReplyDeleteThanks so much for stopping by and commenting. I love how it turned out.
Delete